
- begin
- how it works
- results
- online store
- EarBuddies®
- extra headwear
- adhesive tapes
- adhesive remover
- barrier film & cream
- fitting
- professionals
- help
- Sign in
-

-

Worried Baby's ears stick out and want to fix them? Ear Buddies Splints reshape the soft cartilage of baby ears, resulting in a permanent, surgery-free correction. Correct Sticky Out Ears with Ear Buddies.
EarBuddies™ offer babies a simple, affordable, surgery-free, life-changing solution to Stick-Out Ears & ear shape problems. Order online in a few clicks.
EarBuddies were invented in 1990 by Plastic Surgeon David Gault FRCS, one of the world’s leading experts on reconstructive surgery of the outer ear, to treat his newborn son. EarBuddies are designed to be fitted at home by parents, and are also used in some of the most eminent children’s hospitals worldwide, including the NHS (UK), Mayo Clinic (USA), The Portland Hospital (London), and Boston Children’s Hospital (Harvard).
By treating babies early and avoiding surgery, EarBuddies provide better results, without risk, at lower cost, and avoid the bullying and psychological trauma that usually leads to surgery. Almost thirty years after EarBuddies were first developed, it is the world’s best selling Early Ear Correction™ system, and has helped thousands of babies to grow up comfortable and confident with their ears.

PSYCHOLOGICAL IMPACT
Stick-out ears like Santi's can make life miserable and lead to "reduced quality of life & self-esteem, social avoidance and poor performance in school." Children and adults are often teased and while names like 'Dumbo, Big Ears, Yoda, Spock & Wing Nut' can be meant in jest, they can have a deeper psychological impact.
AVOID EXPENSIVE SURGERY
Once, corrective ear surgery (Otoplasty/ Pinnaplasty) was the only option, costing up to £5000 for the average UK paediatric case. General anaesthesia and time off school or work are usually needed, and while post-op pain can be managed*, complication rates e.g. scarring can be as high as 10%.*

PERMANENT SOLUTION
Now there's an ingenious way to fix your baby's ear problems before they are aware of them, avoiding the emotional impact of bullying & teasing, and the costs & complications of surgery. EarBuddies splints reshape the soft cartilage of baby's ears, resulting in a permanent, surgery-free correction.

LIFE-CHANGING RESULTS
We think of it like fitting braces to a child’s teeth, only more affordable and quicker. Newborn babies can get great results in just 2 weeks. If your baby is older, this can take longer. Santi was 5 months old when his mother fitted EarBuddies. 4 weeks later, he can grow up comfortable and confident with his ears.

Ear of the Month - December 2023 🇲🇽
“Hello. I attach the pictures of my baby’s ear. He was born with just one folded ear. We are from Mexico. I ordered EarBuddies and applied in the ear at the age of 1.5 months, when they arrived. The last picture is after 1 month of using them. It still has a mild fold but is imperceptible. Thank you for the opportunity to correct it.”
Read Sara's story!Ear of the Month - November 2023 🇬🇧
“I used EarBuddies with my 2 youngest children. Best decision ever. Their ears are perfect now. One is 2.5 years old and the other is almost 6 ❤️. When we used EarBuddies with our daughter, the results were amazing! We were talking to friends one day about the shape of our daughter’s ear. They recommended EarBuddies. We hadn't even heard of this before. So we did some research and decided to give it a go.
What if it didn't work? She would be no worse off, as it's a painless process. Yes, you have to pay for the right package, but for us and our daughter, it absolutely paid off. We are so pleased. We tell everyone that talks about their baby's ears. I'm still amazed all these years later when I look at her ears! 100% worth every single penny! This is her now, at almost 6 years old. Thank you!”
Read Keri's Story here!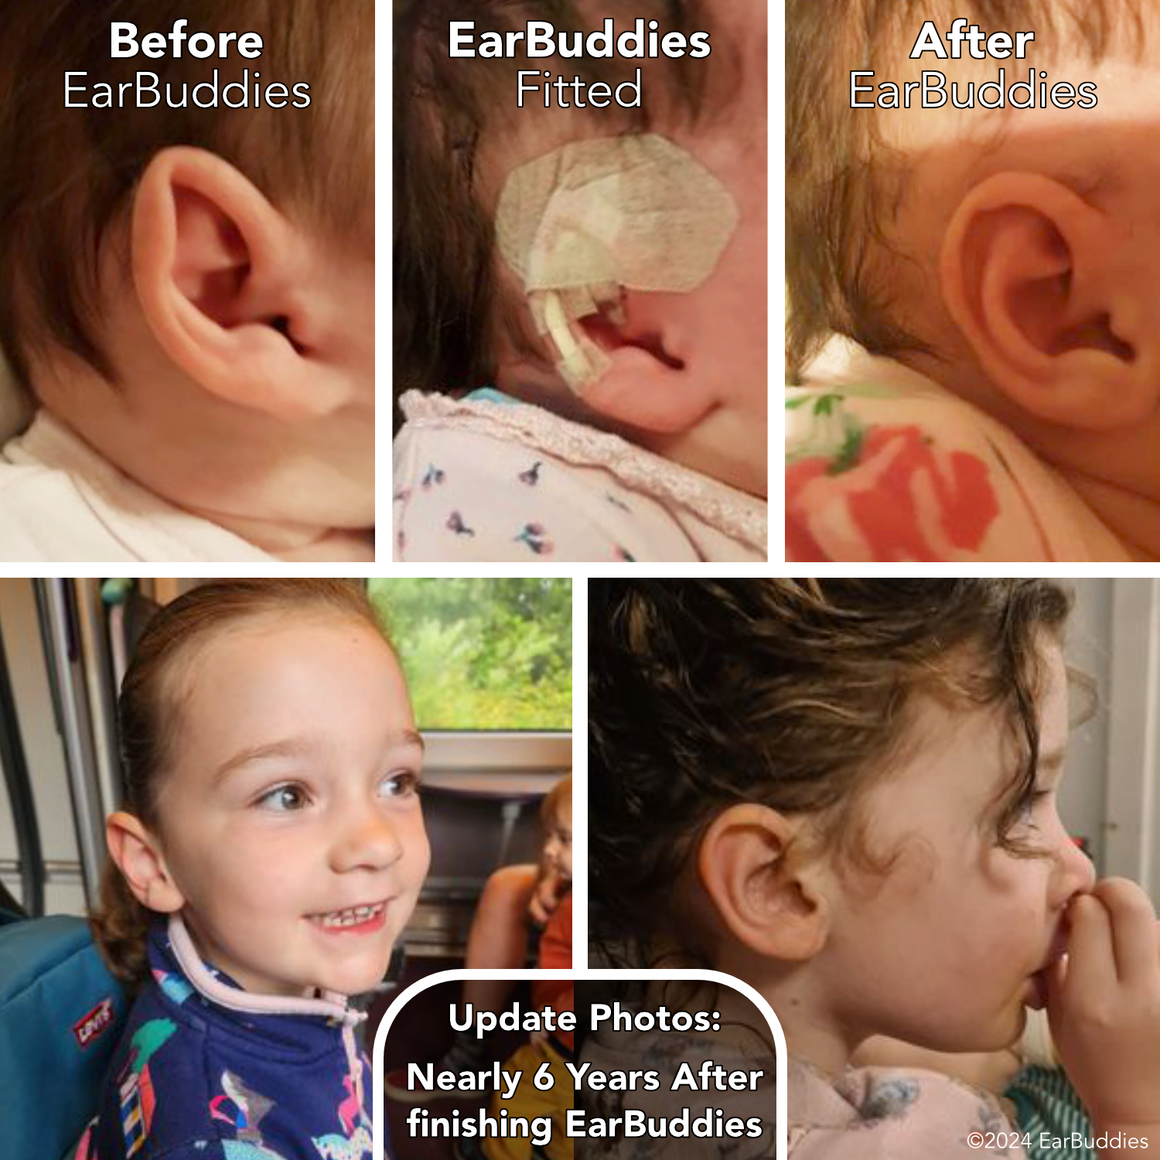
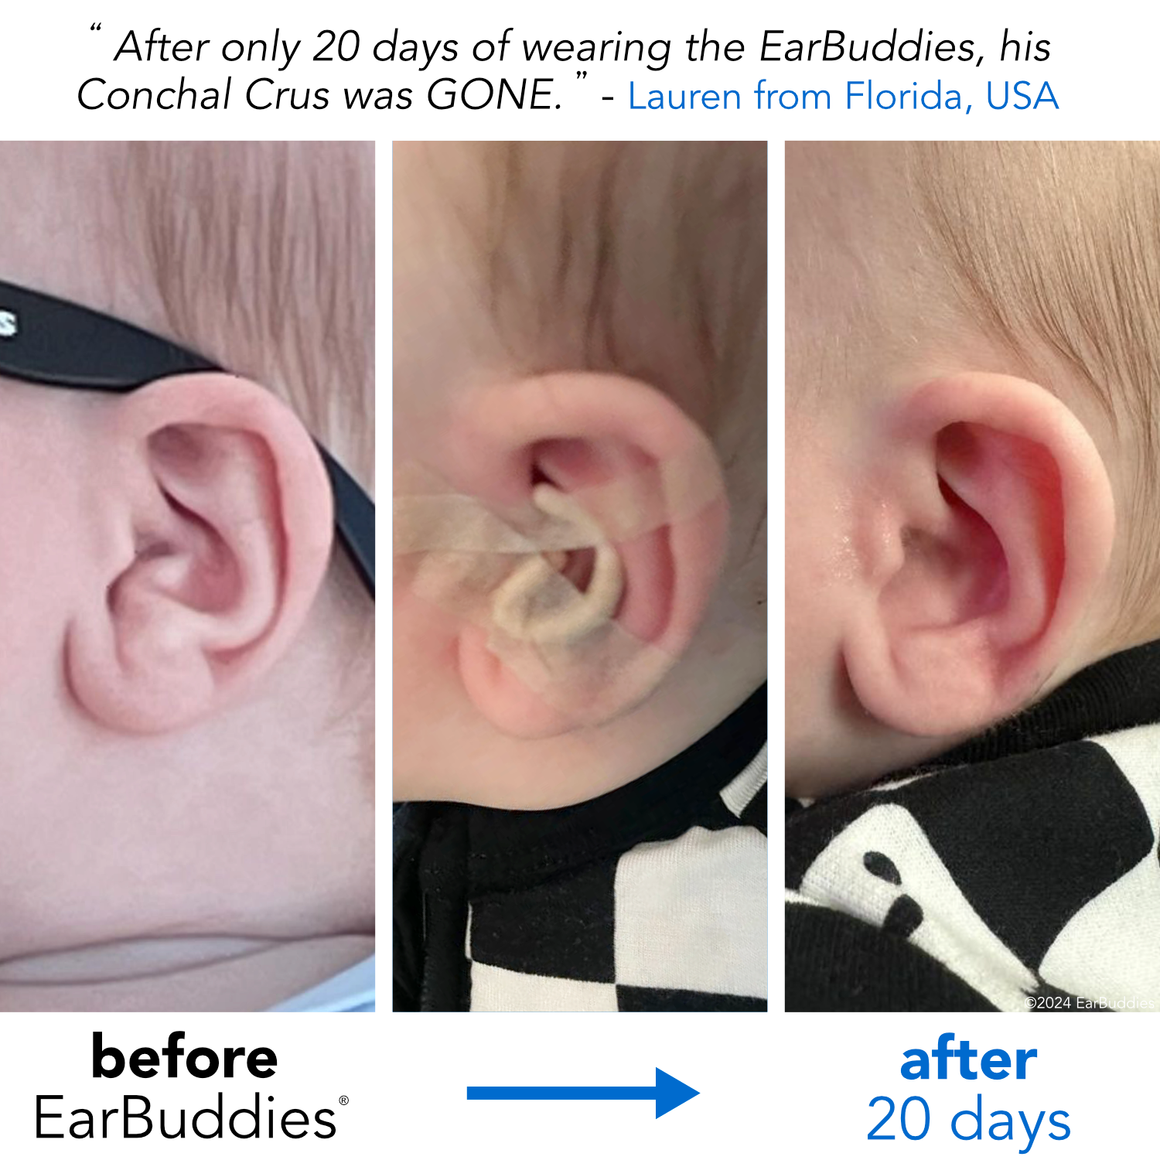
Ear of the Month - October 2023 🇺🇸
“I just wanted to share a pic of our EarBuddies results!! My son was 4 months old when we started. I was afraid it would be too late, but after only 20 days wearing the EarBuddies, his conchal crus was GONE. Two months later and it still looks as perfect as the day we took them out. THANK YOU!!”
Read Lauren's StoryEar of the Month - September 2023 🇬🇧
“We would like to share with you progress of the ear correction of our now 6 months old boy and how happy we are with the results of wearing EarBuddies. We purchased the product when Oscar was 2 months old and he was wearing it for 3 months. We regularly changed the tapes weekly and we followed the instructions. Please see attached pictures:”
Read Magdalena's story here!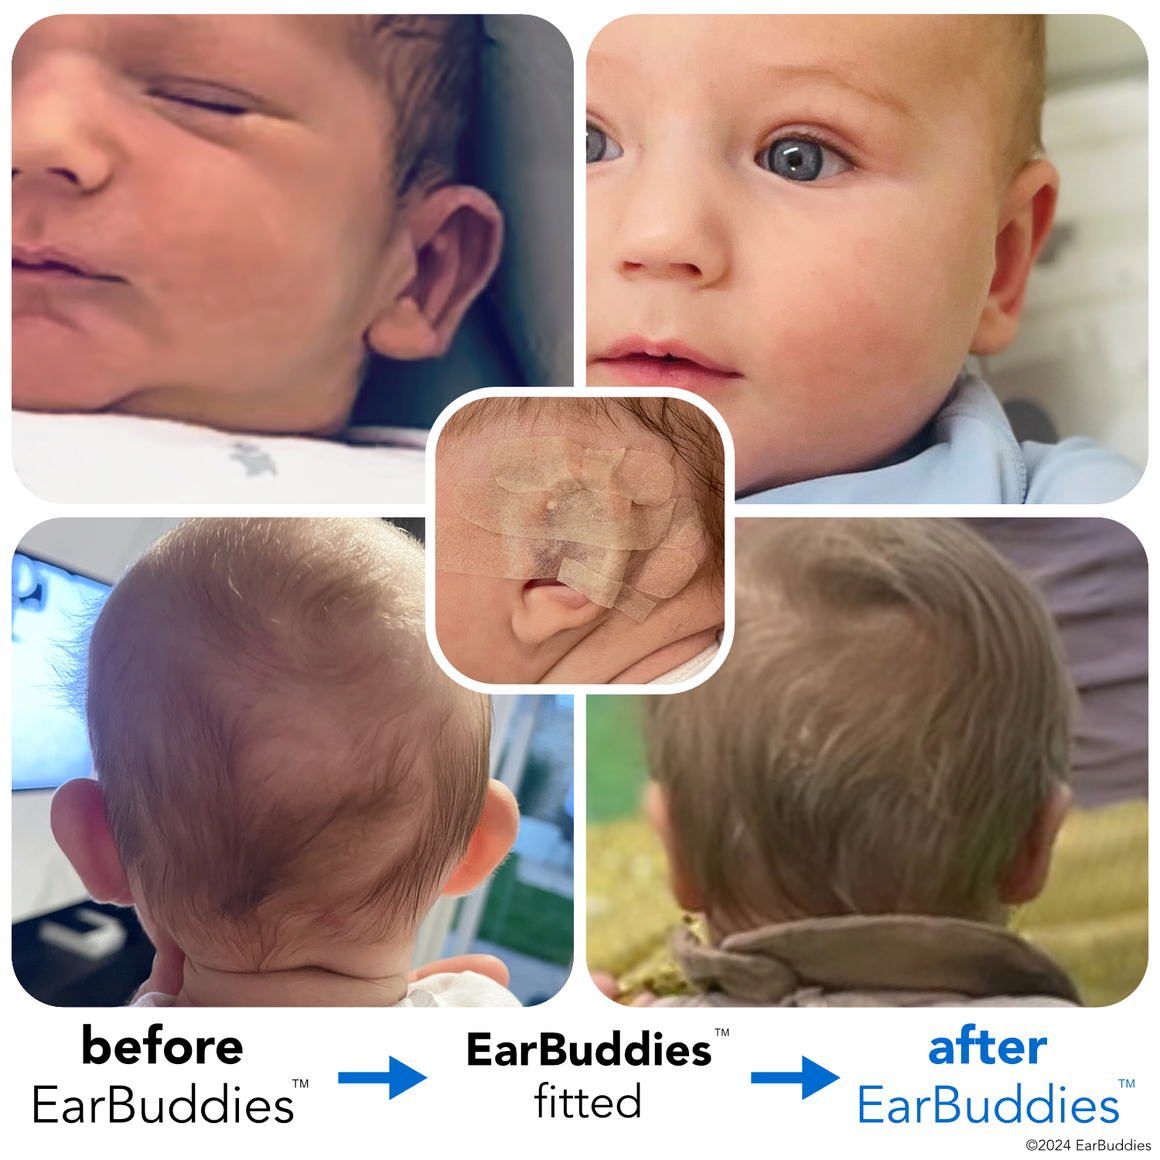
Fit at Home
IN JUST 20 MINUTES
At least 5% of people have abnormally shaped or Stick-Out ears. Stick-Out ears are the most common ear deformity, and around 2% of babies develop Stick-Out ears in the first 6 months of life. EarBuddies can be fitted by parents at home in under 20 minutes. An independent study at the Hospital for Sick Children in Glasgow in 2012 showed a 78% success rate in newborns when splints are fitted by parents, with 73% rating ease of use as 'easy' or 'incredibly easy'. With early splintage and dedication, fantastic results continue to be achieved by parents at home.
HOW IT WORKS?
When your baby is born, the cartilage framework of the ears is extremely soft because of Mum’s hormones. Some squashing of the ears is natural at birth, but if the ears remain an odd shape after 48 hours, or if they start to stick out, this will quite quickly become permanent as the cartilage hardens. EarBuddies splints re-mould the cartilage folds in a baby's ears to restore the natural curves and hold the ear close to the side of the head so that when the framework hardens in the controlled shape, there is a permanent, surgery-free correction.
Backed by Research
Approved by Experts


Professional Fitting
While the majority of EarBuddies™ are fitted by parents at home, when professionally fitted and the treatment supervised, success rates rise to up to 92%, even in older babies or those with difficult ear problems.
Professional fitting combines the surgery-free, permanent correction of EarBuddies™ with the clinical experience of trained fitters. Choose amongst our global network of EarBuddies™ Professionals.


As Seen In...